Have you ever pulled a load of laundry from the dryer, only to find your “dry” clothes are still frustratingly damp? Or perhaps your dryer seems to run endlessly, consuming energy without fully drying your garments? The culprit might be something you rarely consider: your clothes dryer’s moisture sensors. These small, often overlooked components are crucial for efficient drying, and keeping them clean is key to happy laundry days and lower energy bills. This comprehensive guide will walk you through everything you need to know about deep cleaning your dryer’s moisture sensors, ensuring your machine performs at its best.
What Are Clothes Dryer Moisture Sensors and Why Are They Important?
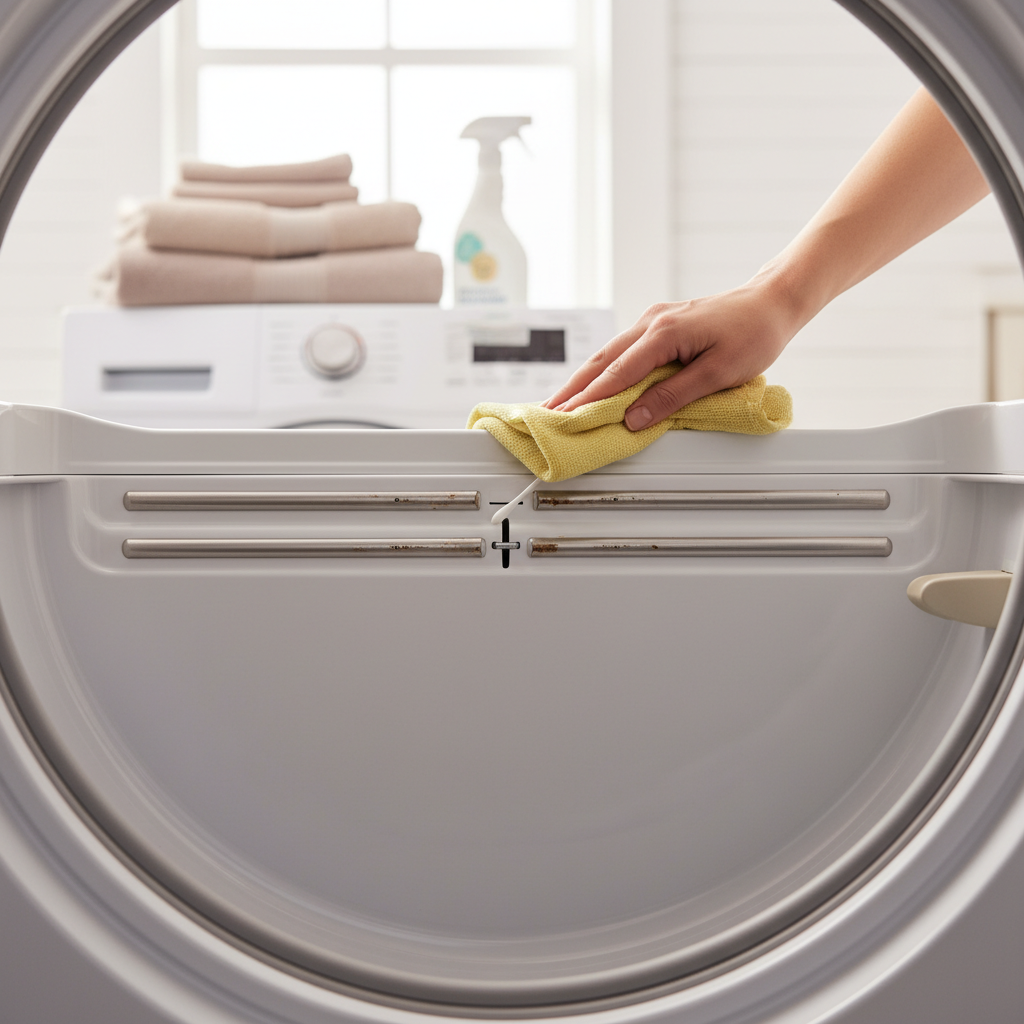
Deep inside your clothes dryer, typically near the lint trap, you’ll find two small, parallel metal strips. These are your dryer’s moisture sensors. Their job is simple yet vital: they detect the amount of moisture present in your clothes as they tumble. Based on these readings, your dryer’s control system adjusts the drying time, ensuring your garments are dried thoroughly without being over-processed.
When functioning correctly, these sensors help prevent both under-drying (leaving clothes damp) and over-drying (which can damage fabrics and waste energy). They are instrumental in achieving optimal drying efficiency and extending the lifespan of your clothes by preventing unnecessary heat exposure. However, over time, a buildup of lint, fabric softener residue, and detergents can accumulate on these sensors, obscuring their ability to accurately “read” the moisture levels. This leads to miscalculations, causing your dryer to either shut off too soon or run much longer than necessary.
Signs Your Moisture Sensors Need Deep Cleaning
Recognizing the signs of dirty moisture sensors can save you a lot of frustration and energy costs. If you notice any of the following issues, it’s likely time for a deep clean:
- Clothes Consistently Damp: This is the most common indicator. If your dryer completes a cycle but your clothes are still noticeably wet or clammy, the sensors might be prematurely signaling that the load is dry.
- Dryer Cycles Running Too Long or Too Short: A dirty sensor might incorrectly detect high moisture, leading to excessively long cycles, or conversely, detect low moisture too early, causing the dryer to stop before clothes are fully dry.
- Increased Energy Consumption: When your dryer runs longer than it needs to, it consumes more electricity or gas, directly impacting your utility bills.
- Unusual Odors: While less common, heavy buildup can sometimes contribute to a musty or burnt odor, especially if lint accumulation becomes significant.
- Error Codes: Some advanced dryer models may display specific error codes related to sensor malfunction or poor drying performance, prompting you to investigate.
Preparing for the Deep Clean: Safety First
Before you begin the cleaning process, safety must be your top priority. Always ensure the dryer is completely disconnected from its power source to prevent any accidental activation or electrical hazards.
Here’s what you’ll need to gather for the task:
- Isopropyl Alcohol (Rubbing Alcohol): This is the most effective and safest cleaning agent for moisture sensors. It dissolves residue effectively and evaporates quickly, leaving no conductive film.
- Clean Microfiber Cloth or Cotton Swabs: These are ideal for gently wiping the sensors without leaving behind lint or abrasive marks.
- Small Flashlight (Optional but Recommended): A flashlight can help you better locate the sensors and inspect their condition, especially in dimly lit laundry areas.
- Non-Abrasive Plastic Scraper (Optional): For very stubborn, caked-on residue, a plastic scraper can be used with extreme caution to gently lift the buildup before wiping. Avoid metal tools.
“Regular maintenance, including sensor cleaning, is not just about performance; it’s about ensuring the longevity of your appliance and preventing costly repairs down the line.”
Step-by-Step Guide to Deep Cleaning Your Dryer Moisture Sensors
With your dryer unplugged and materials ready, follow these simple steps for an effective deep clean:
- Unplug Your Dryer: Double-check that the dryer is completely disconnected from the power outlet. This is a crucial safety step.
- Locate the Moisture Sensors: Open your dryer door. The moisture sensors are typically two thin, parallel metal strips or bars located on the inside of the dryer drum, usually positioned just below the lint trap opening. They can sometimes be silver or slightly discolored due to residue.
- Inspect the Sensors: Use your flashlight to get a clear view of the sensors. You’ll likely see a film of lint, fabric softener, or detergent residue coating them. This buildup is what’s impeding their function.
- Apply Isopropyl Alcohol: Dampen your microfiber cloth or cotton swab generously with isopropyl alcohol. Do not drench it, but ensure it’s moist enough to effectively clean.
- Wipe the Sensors Thoroughly: Gently but firmly wipe down both metal strips of the moisture sensor. Pay close attention to removing all visible residue. You might need to rotate your cloth or use several cotton swabs as they pick up dirt. Continue wiping until the cloth or swab comes away clean.
- Address Stubborn Buildup (If Necessary): If there’s particularly stubborn, caked-on residue that won’t come off with wiping, carefully and gently use a non-abrasive plastic scraper to lift the heavier buildup. Immediately follow this with an alcohol-dampened cloth to remove any loosened particles. Exercise extreme caution to avoid scratching or damaging the sensors.
- Allow to Air Dry: Isopropyl alcohol evaporates quickly, but give the sensors a few minutes to completely air dry before plugging your dryer back in. This ensures no moisture or alcohol residue remains.
- Plug In and Test: Once fully dry, plug your dryer back into the power outlet. Run a small test load or a sensor-dry cycle to observe the improvement in drying performance.
What to Avoid When Cleaning Moisture Sensors
While the process is straightforward, using the wrong materials or techniques can damage your sensors or even pose a safety risk. Avoid the following:
- Water: Never use water to clean your moisture sensors. Water can cause corrosion or leave behind mineral deposits, further hindering sensor accuracy or leading to electrical issues.
- Abrasive Cleaners or Scouring Pads: Harsh cleansers or abrasive materials like steel wool can scratch and permanently damage the delicate metal strips of the sensors, leading to costly repairs.
- Harsh Chemicals: Bleach, ammonia-based cleaners, or other strong chemicals can corrode the sensor material or leave a harmful residue that interferes with electrical conductivity.
- Leaving Residue: Even if you use an appropriate cleaner, failing to wipe away all residue (e.g., from paper towels) can create new problems. Microfiber cloths are ideal for this reason.
Maintenance Tips for Optimal Dryer Performance
Deep cleaning your moisture sensors is an excellent step, but it’s part of a broader maintenance routine that will keep your dryer running smoothly and efficiently for years.
- Regular Lint Trap Cleaning: Clean the lint trap after every single load. This is paramount for fire safety and drying efficiency.
- Clean the Dryer Vent Annually: The dryer vent duct, which runs from the dryer to the outside of your home, can accumulate significant lint. Clean it at least once a year, or more often if you notice extended drying times.
- Avoid Overloading: Overloading your dryer restricts airflow and prevents clothes from tumbling freely, leading to inefficient drying and increased wear on the machine and clothes.
- Sort Clothes by Fabric Type: Different fabrics have different drying needs. Drying heavy items with light items can confuse the sensors and result in uneven drying.
- Schedule Sensor Cleaning: Aim to deep clean your moisture sensors every 3 to 6 months, or more frequently if you regularly use fabric softener sheets or dry heavily soiled items.
Conclusion
A well-maintained dryer, especially one with clean moisture sensors, is a game-changer for your laundry routine and your household budget. By regularly performing this simple deep cleaning task, you’re not just ensuring your clothes come out perfectly dry every time; you’re also boosting your dryer’s energy efficiency, extending its lifespan, and safeguarding your fabrics from unnecessary wear. Don’t let dirty sensors dampen your laundry day. Take a few minutes to give them the care they deserve, and enjoy the peace of mind that comes with a perfectly performing appliance.
What other routine maintenance tasks do you find most impactful for your home appliances?
Frequently Asked Questions
How often should I deep clean my dryer’s moisture sensors?
|
Our Picks for the Best Clothes dryer in 2026
As an Amazon Associate I earn from qualifying purchases.
|
||
| Num | Product | Action |
|---|---|---|
| 1 | Sakugi Clothes Drying Rack, Foldable 2-Level Laundry Drying Rack with Height-Adjustable Wings, for Clothing & Bedding, Free-Standing Space-Saving Rack, Indoor & Outdoor, 55.5" L × 22.8" W, Gray |

|
| 2 | GE PROFILE 7.2 cu. ft. Vented Electric Dryer in White with Auto Dry and Extended Tumble |
|
| 3 | MOJOCO Portable Clothes Dryer - Mini/Compact Dryer for Apartment, RV, Travel - Small Quiet Fast-Drying Machine with Adjustable Timer & Hassle-Free Setup |
|
| 4 | Portable Clothes Dryer, 900W Fast Drying & Large Load Capacity for Laundry and Shoes - Compact Mini Dryer Machine for Travel, Apartments, RV, Dorm Blue |
|
| 5 | HOMIDEC Clothes Drying Rack, Oversized 4-Tier(67.7" High) Foldable Stainless Steel Drying Rack Clothing, Movable Drying Rack with 4 castors, 24 Drying Poles and 14 Hooks for Bed Linen, Clothing, Grey |
|
| 6 | Drying Rack Clothing, 3-Tier Clothes Drying Rack Foldable, Antirust Laundry Drying Rack Collapsible Use for Indoor & Outdoor, 11.8" D x 34.6" W x 35.4" H, White |
|
| 7 | Kenmore 7.0 cu. ft. Front Load Electric Dryer - with Guard to Reduce Wrinkles & Static - Smart Sensor Drying - LED - White |
|
| 8 | Amazon Basics Foldable Portable Clothes Drying Rack for Indoor Air Drying, Collapsible Design, 14.5" D x 29.5" W x 41.8" H, White |
|
| 9 | BLACK+DECKER BCED37 Compact Dryer for Standard Wall Outlet, Small, 4 Modes, Load Volume 13.2 lbs., White |
|
| 10 | Euhomy Dryer, 3.5 Cu. Ft. 1500W Clothes Dryer, Stainless Steel Tumble Dryer with Exhaust Hose for Home, Apartment, Dorm, White |
|
It is recommended to deep clean your dryer’s moisture sensors every 3 to 6 months, or more frequently if you notice a decrease in drying performance, such as clothes remaining damp or cycles running excessively long. Regular use of fabric softener sheets can also necessitate more frequent cleaning due to residue buildup.
Can dirty moisture sensors damage my clothes?
Yes, dirty moisture sensors can lead to clothes being over-dried, which can cause fabrics to wear out faster, shrink, or become brittle. They can also lead to under-drying, which can result in musty odors and require re-drying, adding extra wear and tear.
What is the best cleaner for dryer moisture sensors?
The best cleaner for dryer moisture sensors is isopropyl alcohol (rubbing alcohol). It effectively dissolves lint, fabric softener, and detergent residues without leaving behind any conductive film or causing corrosion. Always use it with a clean microfiber cloth or cotton swab.
Where are the moisture sensors located in my dryer?
In most clothes dryers, the moisture sensors are located inside the dryer drum. They typically appear as two parallel metal strips or bars, often situated near the lint trap opening. You can usually spot them by opening the dryer door and looking inside the drum.
Can I use household cleaning wipes to clean the sensors?
It is generally not recommended to use household cleaning wipes. While they might seem convenient, many contain fragrances, detergents, or other chemicals that can leave a residue on the sensors. This residue can interfere with the sensors’ electrical conductivity and cause further problems. Stick to isopropyl alcohol for the best results.