Few household frustrations compare to pulling a load of clothes from the dryer, expecting warmth and readiness, only to find them still damp and cold. A dryer that runs but doesn’t heat is more than just an inconvenience; it can throw your entire laundry routine into disarray and even signal underlying issues that need attention. But before you panic or call for an expensive repair, there are several common culprits behind a lack of heat, and many have quick, DIY fixes you can tackle yourself. Let’s explore why your dryer might be leaving you with chilly clothes and how to restore its comforting warmth.
Understanding How Your Dryer Heats
To effectively troubleshoot a non-heating dryer, it helps to understand the basic mechanics. Electric and gas dryers achieve heat in different ways. Electric dryers use a heating element—a coiled wire that glows hot when electricity passes through it, warming the air drawn into the drum. Gas dryers, on the other hand, ignite natural gas or propane using an igniter and burner assembly, creating a flame that heats the air. Both types rely on a system of thermostats and thermal fuses to regulate temperature and prevent overheating, ensuring both efficiency and safety during each cycle.
Common Culprits: Why Your Dryer Isn’t Getting Hot
When your dryer stops producing heat, the cause can range from simple oversights to component failures. Identifying the specific issue is the first step toward a solution.
Clogged Lint Filter or Dryer Vent
|
Our Picks for the Best Clothes dryer in 2026
As an Amazon Associate I earn from qualifying purchases.
|
||
| Num | Product | Action |
|---|---|---|
| 1 | BLACK+DECKER BCED37 Compact Dryer for Standard Wall Outlet, Small, 4 Modes, Load Volume 13.2 lbs., White |

|
| 2 | Kenmore 7.0 cu. ft. Front Load Electric Dryer - with Guard to Reduce Wrinkles & Static - Smart Sensor Drying - LED - White |
|
| 3 | Portable Clothes Dryer, 900W Fast Drying & Large Load Capacity for Laundry and Shoes - Compact Mini Dryer Machine for Travel, Apartments, RV, Dorm Blue |
|
| 4 | HOMIDEC Clothes Drying Rack, Oversized 4-Tier(67.7" High) Foldable Stainless Steel Drying Rack Clothing, Movable Drying Rack with 4 castors, 24 Drying Poles and 14 Hooks for Bed Linen, Clothing, Grey |
|
| 5 | GE PROFILE 7.2 cu. ft. Vented Electric Dryer in White with Auto Dry and Extended Tumble |
|
| 6 | Amazon Basics Foldable Portable Clothes Drying Rack for Indoor Air Drying, Collapsible Design, 14.5" D x 29.5" W x 41.8" H, White |
|
| 7 | MOJOCO Portable Clothes Dryer - Mini/Compact Dryer for Apartment, RV, Travel - Small Quiet Fast-Drying Machine with Adjustable Timer & Hassle-Free Setup |
|
| 8 | Drying Rack Clothing, 3-Tier Clothes Drying Rack Foldable, Antirust Laundry Drying Rack Collapsible Use for Indoor & Outdoor, 11.8" D x 34.6" W x 35.4" H, White |
|
| 9 | Sakugi Clothes Drying Rack, Foldable 2-Level Laundry Drying Rack with Height-Adjustable Wings, for Clothing & Bedding, Free-Standing Space-Saving Rack, Indoor & Outdoor, 55.5" L × 22.8" W, Gray |
|
| 10 | Euhomy Dryer, 3.5 Cu. Ft. 1500W Clothes Dryer, Stainless Steel Tumble Dryer with Exhaust Hose for Home, Apartment, Dorm, White |
|
Perhaps the most common reason for a dryer’s heating troubles, a clogged lint filter or obstructed dryer vent can significantly restrict airflow. This reduced airflow forces the dryer to work harder, leading to overheating. To prevent fires, safety mechanisms like thermal fuses or high-limit thermostats will often trip, shutting off the heating function while the drum continues to tumble. This is why your dryer might run but blow only cold air. Regular cleaning of the lint filter is crucial, and the entire vent system also requires periodic attention.
Tripped Circuit Breaker or Power Issues
Electric dryers require a dedicated 240-volt circuit to power both the motor and the heating element. If one of the two 120-volt lines supplying this power trips at the circuit breaker, the motor might still run, but the heating element won’t receive enough voltage to generate heat. This often manifests as the dryer spinning normally but remaining cold. Similarly, a loose or damaged power cord can interrupt the necessary electrical flow. For gas dryers, while they use a standard 120-volt outlet for the motor and controls, a power issue could still affect the igniter or other control components preventing gas from being ignited.
Gas Supply Problems (for Gas Dryers)
If you have a gas dryer and it’s running without heat, the problem might stem from the gas supply itself. A common oversight is a closed gas shut-off valve, which might have been accidentally bumped or turned off during other home maintenance. If the gas valve is open but there’s still no heat, a faulty gas igniter or defective gas valve coils could be preventing the burner from lighting. These components are essential for igniting the gas that produces heat.
Blown Thermal Fuse
The thermal fuse is a critical safety device designed to protect your dryer from overheating. It’s a small, inexpensive, non-resettable component that will blow, cutting power to the heating element (or the entire dryer), if the internal temperature exceeds a safe limit. A blown thermal fuse often indicates an underlying airflow issue, such as a clogged vent, which caused the dryer to overheat in the first place. Once blown, it must be replaced for the dryer to heat again.
Faulty Heating Element (for Electric Dryers)
Over time, the coiled wire within an electric dryer’s heating element can break or burn out. When this happens, electricity can no longer flow through the coil to generate heat. The dryer will continue to tumble, but the air inside will remain cold. This is a common failure point for electric dryers and typically requires replacement of the entire heating element assembly.
Defective Thermostats or Thermistors
Dryers contain several thermostats (cycling, operating, and high-limit) and sometimes a thermistor, which work together to monitor and regulate the temperature inside the drum. If any of these components become faulty, they can send incorrect temperature readings to the control board or fail to open/close circuits as needed, leading to inconsistent heating or no heat at all. A defective thermostat might prevent the heating element from turning on, or a bad thermistor might cause the dryer to cycle off prematurely.
Incorrect Dryer Settings or Load Issues
Sometimes, the simplest explanations are the correct ones. If your dryer is set to a “cool air,” “air fluff,” or “eco-friendly” cycle, it’s designed not to produce heat. Additionally, overloading the dryer can impede proper airflow and tumbling, making it difficult for warm air to circulate effectively and dry clothes. Similarly, placing excessively wet clothes from the washer directly into the dryer can extend drying times dramatically, giving the impression that the dryer isn’t heating properly.
DIY Troubleshooting Steps: Getting Your Heat Back
Many dryer heating issues can be resolved with a bit of troubleshooting and a few basic tools. Always remember to prioritize safety by unplugging your electric dryer or turning off the gas supply for a gas dryer before performing any internal inspections or repairs.
Step 1: Check the Basics First (Settings, Load, Lint Filter)
Start with the easiest and most common issues.
- Verify Dryer Settings: Double-check that your dryer isn’t accidentally set to a “No Heat,” “Air Fluff,” or “Eco” cycle. Select a timed high-heat cycle to ensure it’s attempting to heat.
- Assess Load Size and Wetness: Make sure you’re not overloading the dryer, which restricts airflow. Also, confirm that your washing machine is properly spinning out excess water. If clothes are still soaking wet, run an additional spin cycle in the washer.
- Clean the Lint Filter Thoroughly: This is fundamental for every load. Pull out the lint screen, remove all lint, and reinsert it. For a deeper clean, wash the screen with warm water and a soft brush using liquid detergent every six months to remove any fabric softener residue that might be clogging the mesh.
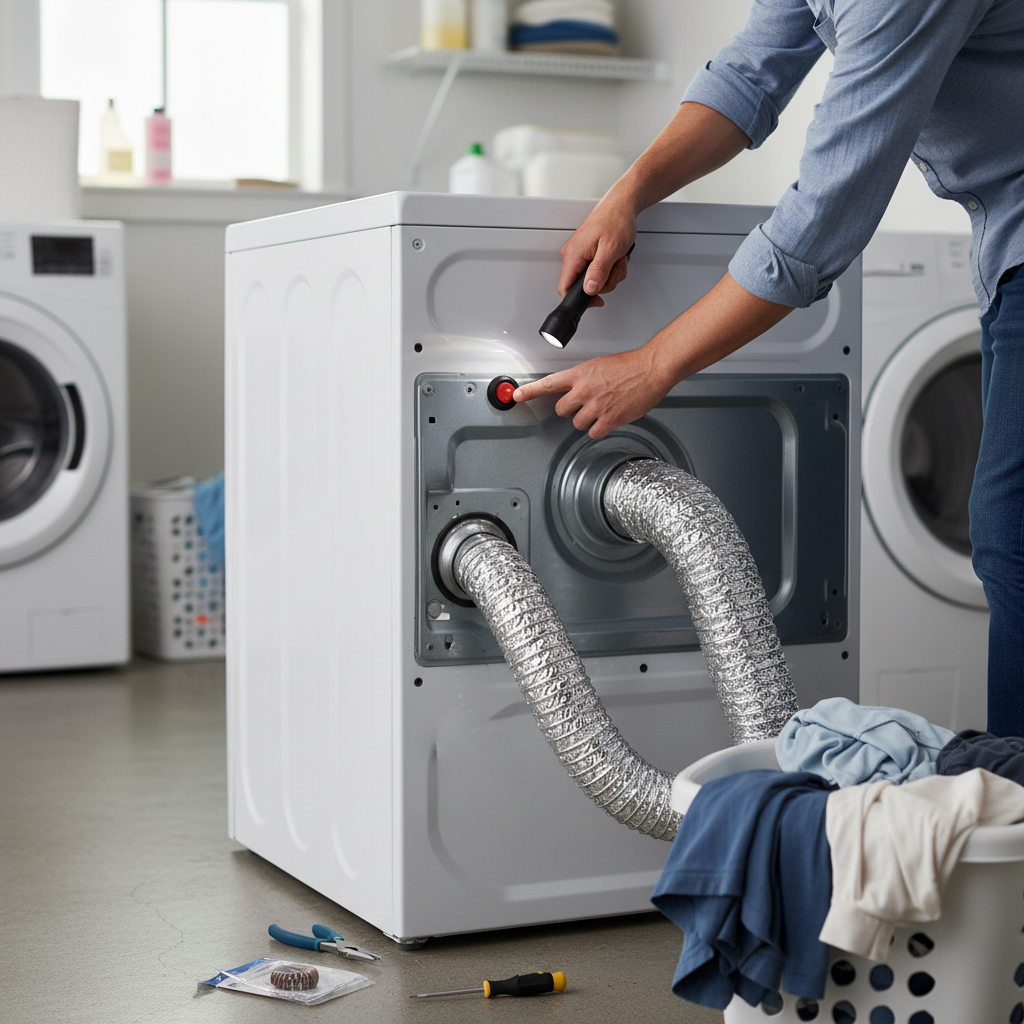
Step 2: Inspect Your Venting System
A clear vent is paramount for both heating and safety.
- Check for Kinks or Obstructions: Disconnect the exhaust hose from the back of the dryer and inspect its entire length for kinks, crushed sections, or lint blockages. Use a vacuum to remove any visible lint.
- Verify Exterior Airflow: With the dryer running on a heat cycle (and the exhaust hose reconnected), go outside and check the exterior vent. You should feel strong, warm air exiting. If the airflow is weak or cold, the blockage is likely further down the vent line, or there’s an internal dryer issue.
- Consider Professional Vent Cleaning: If you suspect blockages deep within the wall or roof venting, professional vent cleaning is highly recommended. This not only restores heating efficiency but also drastically reduces fire hazards.
Step 3: Reset Your Power Supply
Electrical issues are surprisingly common.
- For Electric Dryers: Check and Reset Circuit Breakers: Go to your home’s electrical panel. Look for two side-by-side breakers connected by a bar, typically labeled for your dryer. If one or both are tripped (usually halfway between ON and OFF), firmly switch them completely OFF, then back to ON. This should restore full 240-volt power.
- For Gas Dryers: Ensure the Gas Valve is Fully Open: Locate the gas shut-off valve behind your dryer. Ensure the handle is parallel with the gas pipe, indicating it’s open. If it’s perpendicular, turn it to the open position.
Step 4: Advanced Component Checks (When to use a multimeter)
For these steps, you’ll need to disassemble parts of your dryer and ideally use a multimeter to test for continuity. If you’re uncomfortable with this, it’s best to call a professional. Always disconnect power and gas before opening your dryer.
- Testing the Thermal Fuse: The thermal fuse is usually located on the exhaust ducting or blower housing. After disconnecting power, remove the wires from the fuse. Use a multimeter set to continuity (Ω). If there’s no continuity (an open circuit), the fuse is blown and needs replacement. Remember, replacing the fuse without addressing the underlying cause (like a clogged vent) will likely lead to it blowing again.
- Inspecting the Heating Element (Electric Dryers): The heating element is typically located in a housing at the back or bottom of the dryer. Visually inspect the coils for any breaks or burn marks. For a more definitive test, disconnect the wires and use a multimeter to check for continuity across the element’s terminals. A lack of continuity indicates a broken element.
- Checking Thermostats and Thermistors: Thermostats are usually disc-shaped components. Disconnect the wires and test for continuity. A cycling thermostat should show continuity at room temperature and open when heated (or vice-versa depending on type), while a high-limit thermostat should always show continuity unless it has tripped. Thermistors change resistance with temperature; checking their resistance requires specific values from your dryer’s service manual.
- For Gas Dryers: Examining the Igniter and Gas Valve Coils: If you hear a click but no flame, the igniter or gas valve coils might be at fault. Testing these components can be more intricate and often involves specialized knowledge. A glowing igniter with no flame suggests issues with the gas valve coils, while no glow at all could point to a faulty igniter.
“A dryer’s heating system is a carefully balanced orchestra of components. Even a tiny clog or a minor electrical hiccup can silence the heat, leaving you with damp clothes.” – Michael Chen, Appliance Repair Technician
When to Call a Professional: Knowing Your Limits
While DIY fixes can save you time and money, some dryer heating problems are best left to certified technicians. Knowing when to call in an expert can prevent further damage and ensure your safety.
- Complex Electrical Issues: If circuit breaker resets don’t work, or you suspect wiring problems beyond the outlet, a licensed electrician or appliance technician is essential. Dealing with 240-volt electricity can be dangerous.
- Gas Dryer Component Failures: Issues with the gas valve, igniter, or burner assembly in a gas dryer should always be handled by a professional. Gas leaks are serious safety hazards.
- Uncomfortable with Internal Repairs: If disassembling your dryer or using a multimeter feels daunting, or if you’re unsure about the correct replacement parts, scheduling a service call is the safest option.
- Multiple Component Failures: If several parts seem to be failing, a professional can accurately diagnose the root cause and ensure all necessary repairs are made.
- If DIY Steps Don’t Resolve the Issue: After trying the basic troubleshooting steps, if your dryer still isn’t heating, it’s a clear sign that a deeper, more technical problem exists.
Preventative Maintenance: Keeping Your Dryer Heating Efficiently
Regular maintenance can significantly extend the life of your dryer and prevent many heating issues from occurring in the first place.
- Regular Lint Filter Cleaning: Make it a habit to clean the lint filter after every single load. This maintains optimal airflow and reduces strain on the heating system.
- Annual Dryer Vent Cleaning: Schedule a professional dryer vent cleaning at least once a year, or more frequently if you use your dryer heavily, have pets, or notice longer drying times. This is vital for efficiency and fire prevention.
- Scheduling Professional Appliance Maintenance: Consider an annual check-up by an appliance technician. They can inspect electrical components, gas lines, drum rollers, belts, and safety features, catching potential problems before they lead to a complete breakdown.
- Avoiding Overloading and Over-Wet Clothes: Always respect your dryer’s capacity. Overloading restricts airflow and puts stress on components. Ensure your washer thoroughly spins clothes to remove excess water, reducing the burden on your dryer.
Conclusion
A dryer that isn’t heating can certainly put a damper on your laundry day, but with a systematic approach, you can often pinpoint and fix the problem quickly. From cleaning a clogged lint filter or vent to resetting a tripped circuit breaker, many common issues have straightforward solutions. However, don’t hesitate to seek professional help for complex electrical or gas component failures, as safety should always be your top priority. By understanding the causes and performing regular maintenance, you can keep your dryer running efficiently and ensure your clothes emerge perfectly warm and dry every time. Which of these troubleshooting steps will you try first to restore the warmth to your laundry?
Frequently Asked Questions
Why does my dryer tumble but not heat?
When your dryer tumbles but remains cold, it usually indicates that the motor is working but the heating system is not. Common culprits include a tripped circuit breaker, a blown thermal fuse, a faulty heating element (for electric dryers), or an issue with the gas supply or igniter (for gas dryers).
Can a clogged vent really stop my dryer from heating?
Yes, absolutely. A clogged dryer vent restricts airflow, causing the dryer to overheat. To prevent a fire, safety mechanisms like thermal fuses or thermostats will trip, shutting off the heating element while the drum continues to spin, making the dryer blow cold air.
How do I know if my thermal fuse is blown?
You can test a thermal fuse for continuity using a multimeter after unplugging the dryer and accessing the fuse. If the multimeter shows an open circuit (no continuity), the fuse is blown and needs to be replaced. Remember that a blown fuse often points to an underlying airflow issue.
Is it safe to replace a heating element myself?
Replacing a heating element can be a DIY task if you’re comfortable with basic appliance repair, have the right tools (like a screwdriver and possibly a multimeter), and follow safety precautions, including disconnecting power. However, if you’re unsure or inexperienced, it’s safer to hire a professional.
How often should I clean my dryer vent?
It’s recommended to clean your dryer’s lint filter after every load and to perform a deep cleaning of the filter every six months. The entire dryer vent system (from the dryer to the outside) should be professionally cleaned at least once a year, or more frequently depending on usage and household factors like pets.