Does your clothes dryer sound like it’s trying to escape the laundry room? That jarring noise and persistent “walking” across the floor aren’t just annoying; they’re clear indicators that your appliance is unlevel. Ignoring these signs can lead to excessive wear and tear, diminished performance, and even costly repairs down the line. Thankfully, stopping your dryer from walking is a straightforward task that you can accomplish with a few simple tools and a bit of know-how. This comprehensive guide will walk you through everything you need to know, ensuring your clothes dryer runs smoothly, quietly, and efficiently for years to come.
Understanding Why Your Dryer Walks
A clothes dryer that “walks” or vibrates excessively during operation isn’t just a minor inconvenience; it’s a sign that something is fundamentally off with its setup. Understanding the root causes is the first step toward a lasting solution.
What Causes “Dryer Walking”?
The primary culprit behind a dryer that moves is an uneven appliance resting on an uneven surface. When the dryer’s weight isn’t distributed equally across all its support points, the vibrations from its spinning drum, especially during heavier loads, can cause it to inch across the floor. This imbalance can stem from several factors:
- Uneven Flooring: Many laundry room floors, particularly in older homes, are not perfectly level. Even a slight slope can throw an appliance off balance.
- Improperly Adjusted Leveling Legs: Most dryers come equipped with adjustable leveling legs designed to compensate for uneven surfaces. If these aren’t set correctly, the dryer will wobble.
- Loose Lock Nuts: On models with lock nuts, if they aren’t tightened against the dryer’s body after adjustment, the legs can shift over time, leading to instability.
- Unbalanced Loads: While less common for dryers than washers, extremely bunched-up or heavy items can sometimes contribute to excessive vibration, mimicking a leveling issue.
|
Our Picks for the Best Clothes dryer in 2026
As an Amazon Associate I earn from qualifying purchases.
|
||
| Num | Product | Action |
|---|---|---|
| 1 | Sakugi Clothes Drying Rack, Foldable 2-Level Laundry Drying Rack with Height-Adjustable Wings, for Clothing & Bedding, Free-Standing Space-Saving Rack, Indoor & Outdoor, 55.5" L × 22.8" W, Gray |

|
| 2 | Kenmore 7.0 cu. ft. Front Load Electric Dryer - with Guard to Reduce Wrinkles & Static - Smart Sensor Drying - LED - White |
|
| 3 | MOJOCO Portable Clothes Dryer - Mini/Compact Dryer for Apartment, RV, Travel - Small Quiet Fast-Drying Machine with Adjustable Timer & Hassle-Free Setup |
|
| 4 | HOMIDEC Clothes Drying Rack, Oversized 4-Tier(67.7" High) Foldable Stainless Steel Drying Rack Clothing, Movable Drying Rack with 4 castors, 24 Drying Poles and 14 Hooks for Bed Linen, Clothing, Grey |
|
| 5 | GE PROFILE 7.2 cu. ft. Vented Electric Dryer in White with Auto Dry and Extended Tumble |
|
| 6 | BLACK+DECKER BCED37 Compact Dryer for Standard Wall Outlet, Small, 4 Modes, Load Volume 13.2 lbs., White |
|
| 7 | Amazon Basics Foldable Portable Clothes Drying Rack for Indoor Air Drying, Collapsible Design, 14.5" D x 29.5" W x 41.8" H, White |
|
| 8 | Euhomy Dryer, 3.5 Cu. Ft. 1500W Clothes Dryer, Stainless Steel Tumble Dryer with Exhaust Hose for Home, Apartment, Dorm, White |
|
| 9 | Portable Clothes Dryer, 900W Fast Drying & Large Load Capacity for Laundry and Shoes - Compact Mini Dryer Machine for Travel, Apartments, RV, Dorm Blue |
|
| 10 | Drying Rack Clothing, 3-Tier Clothes Drying Rack Foldable, Antirust Laundry Drying Rack Collapsible Use for Indoor & Outdoor, 11.8" D x 34.6" W x 35.4" H, White |
|
Why Proper Leveling is Crucial
Beyond the irritating noise, an unlevel dryer can have significant negative impacts on both the appliance itself and your household:
- Reduced Noise and Vibration: A properly leveled dryer operates with remarkable quietness, transforming laundry day from a noisy chore into a peaceful routine. The reduction in vibration also prevents the appliance from “walking” away from its designated spot.
- Decreased Wear and Tear: Constant shaking puts immense stress on the dryer’s internal components, including the motor, drum bearings, and belts. By eliminating excessive vibration, you significantly extend the lifespan of these critical parts, saving money on future repairs or replacements.
- Improved Performance: While not as critical as with a washer, an unlevel dryer can sometimes lead to less efficient drying, as the drum might not tumble clothes optimally. A stable machine ensures consistent and effective drying cycles.
- Enhanced Safety: A dryer that moves unexpectedly can pose a tripping hazard or even damage surrounding walls or other appliances. Proper leveling secures it firmly in place.
Taking the time to level your dryer is not merely a fix for a minor annoyance; it’s an essential part of appliance maintenance that safeguards your investment and enhances your home environment.
Essential Tools for Dryer Leveling
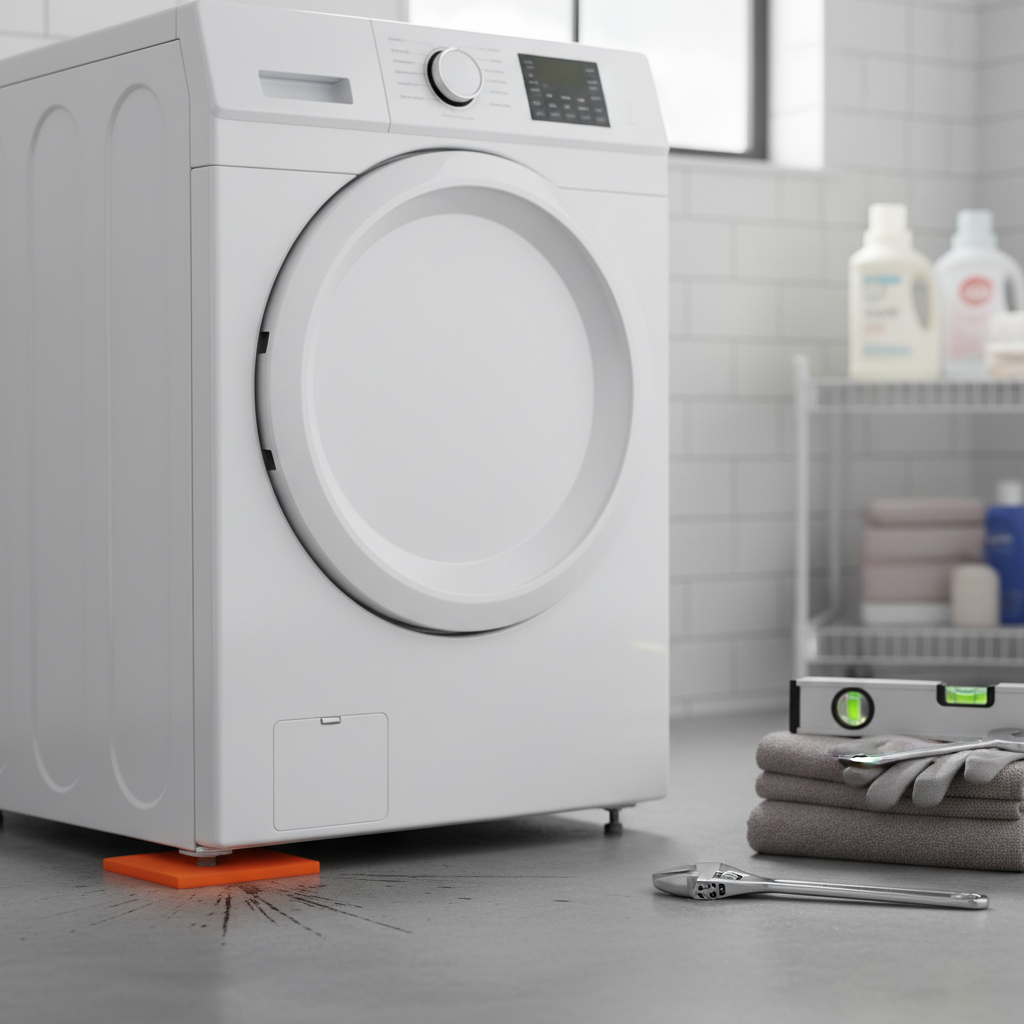
Before you begin, gather the right tools. Having them on hand will make the leveling process smooth and efficient. You won’t need a vast collection, just a few key items.
- A Reliable Level:
- Bubble Level: A standard carpenter’s level (at least 2 feet long) is ideal for checking both side-to-side and front-to-back balance.
- Smartphone App: Many modern smartphones have built-in level apps that can be surprisingly accurate and convenient for quick checks.
- Wrench or Adjustable Pliers:
- You’ll need this to turn the leveling legs. An adjustable wrench or channel-lock pliers will usually work for most dryer models. Some specific models might require a 9/16-inch wrench for their lock nuts.
- Shims (Optional but Recommended):
- Small wooden or plastic shims can be invaluable if your floor has significant dips or slopes that the dryer’s adjustable legs cannot fully compensate for. They provide extra support under the feet.
- Flashlight:
- A flashlight can help you see under the dryer more clearly, especially to locate and adjust the rear leveling legs or lock nuts.
With these simple tools, you’re well-equipped to tackle the task of leveling your dryer and restoring peace to your laundry room.
Step-by-Step Guide: How to Level Your Dryer
Leveling your dryer is a hands-on process that requires precision and patience. Follow these steps carefully to ensure your appliance is perfectly stable.
Step 1: Preparation is Key
Before you start manipulating your appliance, always prioritize safety and access.
- Disconnect Power: Crucially, unplug your dryer from the electrical outlet. This eliminates any risk of electrical shock during the process.
- Move the Dryer: Gently pull the dryer away from the wall and any other adjacent appliances. You’ll need enough space to comfortably access all four leveling legs, especially the rear ones. If your dryer has a vent hose, be mindful not to damage it.
- Clear the Area: Ensure the floor around and under the dryer is clear of debris, lint, or anything that could obstruct your view or impede the leveling process.
Step 2: Initial Assessment – Check for Level
With the dryer in an accessible position, it’s time to determine just how unlevel it is.
- The Rock Test: First, try gently rocking the dryer by pushing down on each of its four corners. If it wobbles, you’ve confirmed it’s not level.
- Use Your Level: Place your bubble level on top of the dryer, first running from side-to-side, then front-to-back. Observe the bubble: if it’s not perfectly centered between the lines, that side or front/back needs adjustment. Repeat this process by placing the level diagonally across the top of the appliance to catch any subtle twists.
- Identify Problematic Legs: Note which corners are high and which are low. This will guide your adjustments.
Step 3: Adjusting the Leveling Legs
Most dryers have adjustable legs, typically four, though some older models or specific designs might vary.
- Locate the Legs: These are usually threaded bolts located at each corner of the dryer’s base.
- Loosen Lock Nuts (If Present): Many leveling legs have a lock nut (or “jam nut”) positioned just above the foot. This nut secures the leg in place once adjusted. You’ll need to loosen it by turning it counter-clockwise with your wrench before you can adjust the leg itself.
- Raise or Lower:
- To raise a corner: Turn the leveling leg counter-clockwise.
- To lower a corner: Turn the leveling leg clockwise.
- Make small, incremental adjustments. It’s often easier to raise the lower legs until they make firm contact with the floor, rather than trying to lower the higher ones excessively.
- Accessing Rear Legs: The rear legs can be trickier. You might need to gently tilt the dryer forward (with a helper for safety) or use your flashlight to see and adjust them. Some newer models have self-leveling rear legs, meaning only the front two are manually adjustable. In such cases, adjust the front legs until the dryer is level front-to-back, and the rear legs will often settle into place. Ensure all four feet are making solid contact with the floor.
Step 4: Re-checking and Fine-Tuning
After making adjustments, don’t assume the job is done.
- Re-test with Level: Place your level back on the dryer in all directions (side-to-side, front-to-back, and diagonally). Continue making small adjustments to the legs until the bubble is perfectly centered in every position.
- Perform the Rock Test Again: Push down firmly on each corner. The dryer should feel solid and not rock or wobble at all. If it still moves, identify the loose corner and adjust that leg further until it’s firmly grounded.
Step 5: Tighten the Lock Nuts and Final Checks
This crucial step prevents your dryer from becoming unlevel again over time.
- Tighten Lock Nuts: Once the dryer is perfectly level and stable, tighten all the lock nuts (if applicable) firmly against the body of the dryer. This locks the leveling legs in their adjusted position, preventing them from unscrewing during operation.
- Reconnect and Reposition: Carefully push the dryer back into its final position, ensuring the vent hose isn’t kinked and the power cord is clear. Plug the dryer back in.
- Run a Test Load: Load the dryer with a normal amount of laundry and run a short cycle. Observe for any excessive noise, vibration, or movement. If the issue persists, repeat the leveling process or consider other troubleshooting steps.
By diligently following these steps, you’ll ensure your dryer is properly leveled, significantly reducing noise and vibration, and promoting its longevity.
Troubleshooting Common Dryer Movement Issues Beyond Leveling
Even after carefully leveling your dryer, you might occasionally encounter residual movement or vibration. It’s important to differentiate between a leveling issue and other potential culprits.
Beyond Leveling: Unbalanced Loads
While more common with washing machines, an extremely unbalanced load can sometimes contribute to a dryer’s excessive vibration. If you’ve leveled your dryer and it still seems to shake, consider the following:
- Distribute Items Evenly: Large, heavy items like blankets, comforters, or several pairs of jeans can clump together during tumbling. Try to redistribute the load more evenly within the dryer drum.
- Avoid Overloading: Stuffing the dryer too full can hinder proper tumbling and lead to uneven distribution, causing the machine to shake. Dry smaller loads if you suspect this is the case.
Soft Flooring Solutions
Carpeting or uneven subflooring can sometimes make achieving perfect stability challenging, even with adjusted legs.
- Dryer Pads: Anti-vibration pads placed under each leveling leg can help absorb minor shakes and prevent the dryer feet from sinking into softer surfaces like carpet.
- Plywood Base: For very uneven or soft floors, consider placing a sturdy piece of plywood (at least 3/4-inch thick) under the entire dryer. Ensure the plywood itself is level before placing the dryer on top and then leveling the dryer’s feet on the plywood. This creates a stable, even platform.
When to Call in the Professionals
While leveling addresses the vast majority of “dryer walking” issues, there are instances where professional intervention is necessary.
“A well-maintained dryer not only performs better but also lasts longer, saving homeowners money and hassle in the long run. Proper leveling is foundational to this maintenance.”
If you’ve followed all the leveling steps, addressed potential load imbalances, and considered flooring solutions, but your dryer still vibrates excessively, it might indicate a more serious internal problem. Issues that typically require a qualified appliance technician include:
- Worn Drum Rollers: The rollers that support the dryer drum can wear out, leading to knocking or grinding noises and excessive vibration.
- Damaged Drum Bearings: Faulty bearings can cause the drum to wobble or make squealing sounds.
- Broken or Worn Drive Belt: A damaged belt can affect drum rotation and balance.
- Suspension System Problems: Some dryers have internal suspension components that can fail.
Do not attempt to repair these internal components yourself unless you are a trained professional. Contacting a reputable appliance repair service is the safest and most effective course of action in such situations.
Maintaining Your Dryer for Optimal Performance
Beyond just leveling, regular maintenance plays a vital role in ensuring your dryer operates efficiently, safely, and quietly. Simple habits can prevent future issues and extend your appliance’s life.
- Regular Level Checks: Periodically re-check your dryer’s level, especially if you notice new noises or subtle movements. Floors can shift, and legs can slowly loosen over time. A quick check every few months can preempt significant problems.
- Keep it Clean:
- Lint Trap: Clean the lint trap before or after every load. A clogged lint trap reduces airflow, decreases drying efficiency, and is a significant fire hazard.
- Vent System: Annually, inspect and clean the dryer’s exhaust vent system, from the back of the dryer to the exterior vent hood. Blocked vents restrict airflow, leading to longer drying times and overheating, which can strain the dryer’s components.
- Load Management: Always avoid overloading your dryer. Overloading puts undue stress on the motor, drum, and belt, leading to premature wear and tear. It also prevents clothes from drying thoroughly and efficiently.
- Exterior Cleaning: Wipe down the exterior of your dryer regularly with a soft cloth and mild cleaner. This keeps it looking good and prevents dust and grime from building up in crevices.
By incorporating these maintenance tips into your routine, you’ll not only enjoy a quieter, more stable dryer but also ensure its long-term reliability and energy efficiency.
Conclusion
A “walking” clothes dryer is more than just an annoyance; it’s a symptom of an underlying issue that can impact your appliance’s efficiency, longevity, and even safety. Taking the time to properly level your clothes dryer is a fundamental maintenance task that significantly reduces noise, minimizes wear and tear, and ensures optimal performance. By following the detailed steps—from gathering your tools to making precise adjustments and tightening those crucial lock nuts—you empower yourself to resolve this common problem effectively. Remember that while leveling is often the solution, occasional issues may require balancing loads or addressing soft flooring.
Has leveling your dryer made a noticeable difference in your laundry routine? Sharing your experience can help others facing similar challenges.
Frequently Asked Questions
Why does my dryer vibrate so much during a cycle?
Excessive dryer vibration is most commonly caused by the appliance not being level on the floor. An uneven surface or improperly adjusted leveling legs prevent the dryer’s weight from being evenly distributed, causing it to shake and “walk” during operation, especially with heavy loads.
What tools do I need to level a dryer?
To level a dryer, you will primarily need a reliable level (either a bubble level or a smartphone app) and a wrench or adjustable pliers to turn the leveling legs. In some cases, small shims may be helpful for very uneven floors.
How do I adjust the feet on my dryer?
To adjust the feet, first, unplug the dryer and pull it away from the wall. Locate the threaded leveling legs at each corner. If present, loosen any lock nuts. Turn the leg clockwise to lower that corner or counter-clockwise to raise it. Use a level to guide your adjustments, ensuring all four feet make firm contact with the floor.
Can an unbalanced load make my dryer walk?
While less frequent than with washers, an extremely unbalanced or overloaded dryer can sometimes contribute to excessive vibration and movement. Distribute clothes evenly and avoid overfilling the drum to minimize this possibility.
When should I call a professional for a vibrating dryer?
If you’ve thoroughly leveled your dryer, checked for unbalanced loads, and ensured your flooring is stable, but the vibration persists, it might indicate an internal mechanical issue such as worn drum rollers, damaged bearings, or a faulty suspension system. In such cases, it’s best to consult a qualified appliance technician.